Imagine having a stunning website that looks like it cost thousands of dollars, but you created it for free. Sounds too good to be true? Think again. In today’s digital age, a professional online presence is crucial for businesses and individuals alike. But the high costs associated with web development often deter many from taking the plunge.
Enter the game-changing solution: free website builders. These powerful tools have revolutionized the web design landscape, making it possible for anyone to create a jaw-dropping website without spending a dime or knowing a single line of code. But with so many options available, where do you start? 🤔 How do you ensure your site stands out from the crowd?
In this guide, we’ll unveil the ultimate hack to create a stunning website for free in just 5 simple steps. From choosing the right website builder to optimizing your site for search engines, we’ll walk you through the entire process, empowering you to launch a professional-looking website that rivals those created by expensive agencies. Get ready to unleash your creativity and make your mark on the digital world – all without breaking the bank.
Choose a Free Website Builder

Compare popular free options
When it comes to creating a website without coding, several free website builders stand out from the crowd. Each platform offers unique features and templates, catering to different needs and skill levels. Let’s compare some of the most popular options:
| Platform | Best For | Ease of Use | Customization | SEO Tools | E-commerce |
|---|---|---|---|---|---|
| Wix | Beginners | High | High | Good | Limited |
| WordPress.com | Bloggers | Medium | Medium | Excellent | Limited |
| Google Sites | Simple sites | Very High | Low | Basic | No |
| Weebly | Small businesses | High | Medium | Good | Basic |
| Site123 | Quick setup | Very High | Low | Basic | Limited |
-
Wix: Known for its user-friendly drag-and-drop interface, Wix offers a wide range of customizable templates. It’s ideal for beginners who want creative control without coding knowledge.
-
WordPress.com: Perfect for bloggers and content-heavy sites, WordPress.com provides a balance between ease of use and customization options. It offers excellent SEO capabilities out of the box.
-
Google Sites: Extremely easy to use, Google Sites integrates well with other Google services. However, it lacks advanced customization options and is best suited for simple, informational websites.
-
Weebly: Offering a good balance between simplicity and functionality, Weebly is great for small businesses. It provides decent e-commerce features in its free plan.
-
Site123: This platform focuses on quick and easy website creation. While it lacks advanced customization, it’s perfect for those who need a simple website up and running fast.
Evaluate features and limitations
When choosing a free website builder, it’s crucial to understand both the features and limitations of each platform. Here’s a deeper dive into what you can expect:
-
Templates and Design:
- Most free website builders offer a variety of templates to choose from.
- However, the number and quality of free templates may be limited compared to paid plans.
- Some platforms like Wix and Weebly allow significant customization of templates, while others like Google Sites are more restrictive.
-
Storage and Bandwidth:
- Free plans typically come with limited storage space and bandwidth.
- This can affect the number of pages, images, and videos you can host, as well as the amount of traffic your site can handle.
-
Domain and Branding:
- Free plans usually provide a subdomain (e.g., yoursite.wixsite.com) rather than a custom domain.
- Most platforms will display their branding or ads on your free website.
-
E-commerce Capabilities:
- While some platforms offer basic e-commerce features in their free plans, advanced functionalities are usually reserved for paid tiers.
- Free e-commerce options often come with transaction fees or limits on the number of products you can sell.
-
SEO Tools:
- Basic SEO tools are usually available in free plans, allowing you to edit meta titles and descriptions.
- More advanced SEO features, like XML sitemaps or structured data tools, may require an upgrade.
-
Support:
- Free users typically have access to knowledge bases and community forums.
- Direct customer support is often limited or unavailable for free plan users.
-
Scalability:
- As your website grows, you may find the limitations of free plans restrictive.
- Consider the ease of upgrading to paid plans and the additional features you’ll gain.
-
Integration with Third-Party Tools:
- Free plans often have limited integration capabilities with external tools and services.
- This can affect your ability to add advanced functionalities like marketing automation or analytics.
When evaluating these features and limitations, consider your immediate needs as well as potential future requirements. While free plans can be an excellent starting point, understanding their constraints will help you make an informed decision about which platform best suits your goals.
Select the best platform for your needs
Choosing the right free website builder depends on your specific needs, goals, and technical skills. Here’s a guide to help you select the best platform:
-
Define Your Website’s Purpose:
- Personal blog: WordPress.com or Wix
- Portfolio: Wix or Weebly
- Small business: Weebly or Wix
- Informational site: Google Sites or Site123
-
Consider Your Technical Skills:
- No technical experience: Google Sites or Site123
- Basic computer skills: Wix or Weebly
- Some coding knowledge: WordPress.com
-
Evaluate Design Requirements:
- Highly customizable: Wix
- Professional templates: Weebly or WordPress.com
- Simple and clean: Google Sites
-
Assess Content Management Needs:
- Frequent updates: WordPress.com
- Static content: Google Sites or Site123
- Mix of static and dynamic: Wix or Weebly
-
Factor in Growth Potential:
- Scalability: WordPress.com or Wix
- E-commerce expansion: Weebly or Wix
- Multilingual capabilities: Wix or WordPress.com
-
Consider SEO Importance:
- High SEO priority: WordPress.com
- Basic SEO needs: Wix or Weebly
-
Evaluate Mobile Responsiveness:
- All mentioned platforms offer mobile-responsive designs, but test thoroughly on various devices.
When making your final decision, remember that the best platform is the one that aligns most closely with your specific needs and future goals. Don’t be afraid to try out multiple platforms before committing to one. Many website builders offer free trials of their paid plans, which can give you a better idea of the full capabilities of each platform.
Now that you’ve selected the best free website builder for your needs, it’s time to move on to planning your website structure. This crucial step will help you organize your content effectively and create a user-friendly navigation system for your visitors.
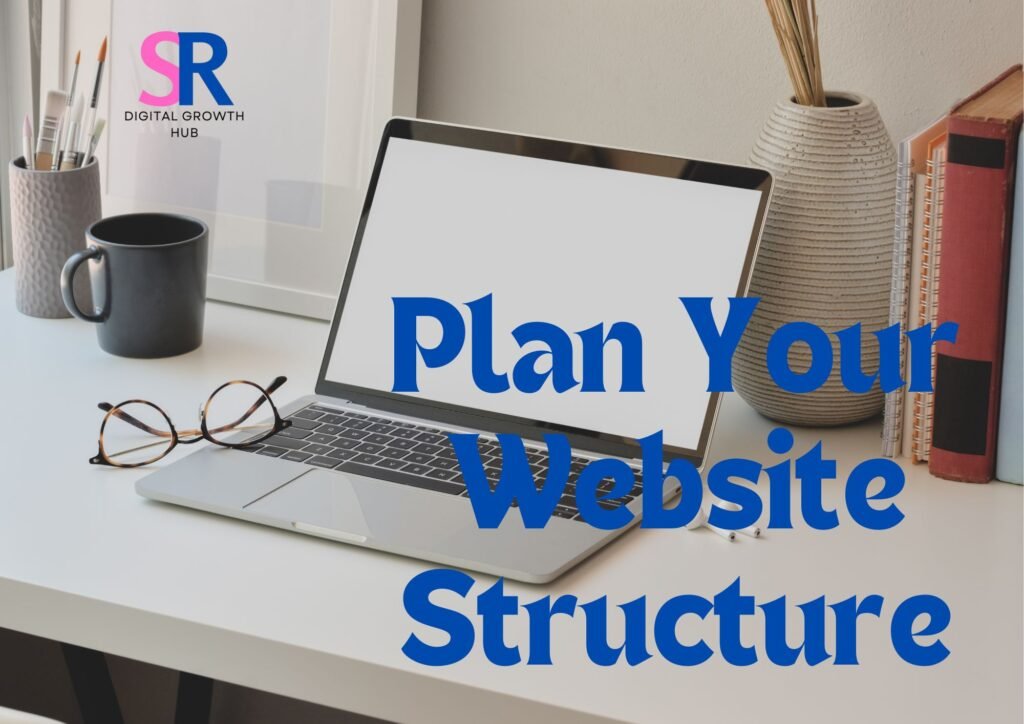
Plan Your Website Structure
Define your website’s purpose
Before diving into the nitty-gritty of website creation, it’s crucial to establish a clear purpose for your site. This foundational step will guide all subsequent decisions, from design choices to content creation. Consider the following aspects when defining your website’s purpose:
- Target audience
- Primary goals
- Unique value proposition
- Key features or services
To help you clarify your website’s purpose, use this decision matrix:
| Aspect | Questions to Consider | Your Answers |
|---|---|---|
| Target Audience | Who is your ideal visitor? What are their needs and preferences? | |
| Primary Goals | What do you want to achieve with your website? (e.g., inform, sell, engage) | |
| Unique Value Proposition | What sets your website apart from competitors? | |
| Key Features/Services | What main offerings will your website provide? |
By answering these questions, you’ll have a solid foundation for your website’s structure and content strategy.
Outline key pages and content
Once you’ve defined your website’s purpose, the next step is to outline the key pages and content that will form the backbone of your site. This outline will serve as a roadmap for your website’s structure and help ensure that you cover all essential information.
Start by listing the main pages that every website typically needs:
- Home page
- About page
- Products/Services page
- Contact page
Next, consider additional pages that are specific to your website’s purpose and target audience. For example:
- Blog (for content marketing and SEO)
- Portfolio (for showcasing work)
- Testimonials (for building trust)
- FAQ (for addressing common questions)
- Resources (for providing valuable information)
For each page, create a brief content outline. This will help you organize your thoughts and ensure that each page serves its intended purpose. Here’s an example structure for a home page:
- Header
- Logo
- Navigation menu
- Hero section
- Compelling headline
- Brief value proposition
- Call-to-action (CTA) button
- Featured products/services
- Benefits or unique selling points
- Social proof (testimonials, client logos)
- Recent blog posts or news
- Newsletter signup
- Footer
- Contact information
- Social media links
- Legal information
Remember to prioritize content based on your website’s purpose and your target audience’s needs. Use clear, concise language and incorporate relevant keywords naturally to improve search engine optimization (SEO).
Create a site map
A site map is a visual representation of your website’s structure, showing how pages are organized and linked together. Creating a site map helps you:
- Visualize the overall structure of your website
- Ensure logical navigation and user flow
- Identify potential gaps in content
- Plan for future growth and scalability
To create an effective site map, follow these steps:
-
List all pages: Start with the main pages you outlined earlier and add any subpages or categories.
-
Organize hierarchically: Arrange pages in a logical hierarchy, with the home page at the top and subpages nested under their parent pages.
-
Show relationships: Use lines or arrows to indicate links between pages.
-
Consider user flow: Think about how visitors will navigate through your site and ensure that important pages are easily accessible.
-
Include navigation elements: Add key navigation components like the main menu, footer links, and any sidebar navigation.
Here’s a simple example of a site map structure using Markdown:
- Home
  - About
    - Team
    - Mission
  - Products/Services
    - Category 1
    - Category 2
    - Category 3
  - Blog
    - Category A
    - Category B
  - Contact
  - FAQ
For more complex websites, you may want to use specialized site mapping tools or software to create a more detailed visual representation.
When creating your site map, keep these best practices in mind:
- Aim for a shallow hierarchy: Try to keep your site structure no more than three levels deep for easy navigation.
- Use descriptive page names: Choose clear, concise names that accurately reflect the content of each page.
- Plan for scalability: Consider how your site might grow in the future and leave room for expansion.
- Include key user paths: Highlight important user journeys, such as the path from the home page to a product purchase.
- Consider mobile navigation: Ensure that your site structure works well on mobile devices, where screen space is limited.
By carefully planning your website structure, you’ll create a solid foundation for a user-friendly and effective website. This planning phase will save you time and effort in the long run, as it’s much easier to make changes at this stage than after you’ve built out your entire site.
Now that you have a clear purpose, outlined key pages and content, and created a site map, you’re ready to move on to the next exciting phase: designing your website. This well-thought-out structure will serve as a guide for your design choices, ensuring that your website not only looks great but also functions effectively to meet your goals and serve your target audience.
Design Your Website

A. Select a suitable template
Choosing the right template is crucial for creating a stunning website that aligns with your brand and purpose. Most free website builders offer a wide array of templates catering to various industries and purposes. Here’s how to select the perfect template for your needs:
-
Consider your website’s purpose:
- E-commerce
- Portfolio
- Blog
- Business website
- Personal website
-
Evaluate industry-specific templates:
- Restaurant
- Photography
- Fitness
- Real estate
- Technology
-
Assess template features:
- Responsive design
- Customization options
- Loading speed
- Built-in functionality
When browsing through templates, keep your brand identity and target audience in mind. Look for designs that resonate with your vision and can effectively showcase your content.
| Template Type | Pros | Cons |
|---|---|---|
| Minimalist | Clean, fast-loading, focuses on content | May lack visual appeal for some industries |
| Bold and colorful | Eye-catching, great for creative businesses | Can be overwhelming if not balanced well |
| Photo-centric | Ideal for visual portfolios or travel blogs | Requires high-quality images |
| Grid-based | Organized, great for showcasing multiple products | May limit creativity in layout |
| One-page | Simple, great for small businesses or events | Limited space for extensive content |
Remember, the template you choose will serve as the foundation for your website’s design. While you can customize it later, selecting a template that closely matches your vision will save time and effort in the long run.
B. Customize colors and fonts
Once you’ve selected a suitable template, it’s time to personalize it with your brand’s colors and fonts. This step is crucial in creating a cohesive and professional-looking website that reflects your unique identity.
- Choose your color palette:
- Primary color: Your main brand color
- Secondary color: Complementary to your primary color
- Accent color: Used sparingly for calls-to-action or highlights
- Neutral colors: For background and text
When selecting colors, consider color psychology and how different hues can evoke specific emotions or associations. Use a color wheel tool to find complementary or analogous color schemes that work well together.
- Select appropriate fonts:
- Headline font: Bold and attention-grabbing
- Body font: Easily readable for longer text
- Accent font: Used sparingly for emphasis or special elements
Limit your font selection to 2-3 fonts maximum to maintain a clean and professional look. Ensure that your chosen fonts are web-safe or easily embeddable to maintain consistency across different devices and browsers.
| Font Type | Examples | Best Used For |
|---|---|---|
| Serif | Times New Roman, Georgia | Traditional, formal content |
| Sans-serif | Arial, Helvetica | Modern, clean designs |
| Display | Impact, Lobster | Headlines, logos |
| Script | Brush Script, Lucida Handwriting | Accent text, special elements |
- Apply your customizations:
- Use your primary color for main elements like headers or navigation bars
- Apply secondary colors to supporting elements or backgrounds
- Use accent colors sparingly for calls-to-action or important information
- Ensure proper contrast between text and background colors for readability
- Apply your headline font to titles and subheadings
- Use your body font for paragraphs and longer text sections
- Incorporate your accent font for quotes or special callouts
Remember to maintain consistency throughout your website. Use your chosen colors and fonts consistently across all pages to create a cohesive and professional look.
C. Add your logo and branding elements
Incorporating your logo and other branding elements is essential for creating a unique and memorable website that represents your brand identity. Here’s how to effectively add these elements:
- Logo placement:
- Header: The most common and visible location
- Footer: For reinforcement and consistency
- Favicon: A small version of your logo for browser tabs
Ensure your logo is high-quality and scales well for different screen sizes. Consider creating variations of your logo (e.g., full color, monochrome, or simplified versions) for different uses across your site.
- Branding elements to consider:
- Tagline or slogan
- Brand mascot or character
- Unique icons or graphics
- Branded images or photographs
- Custom patterns or textures
Incorporate these elements strategically throughout your website to reinforce your brand identity without overwhelming the design.
- Consistency in branding:
- Use the same logo version across all pages
- Maintain consistent spacing around your logo
- Apply your brand colors to various elements (buttons, links, backgrounds)
- Use your brand fonts for headings and body text
- Incorporate your brand voice in all written content
| Branding Element | Purpose | Implementation |
|---|---|---|
| Logo | Brand identification | Header, footer, favicon |
| Tagline | Communicate brand message | Near logo or in header |
| Brand colors | Visual consistency | Backgrounds, buttons, accents |
| Typography | Reinforce brand personality | Headings, body text, menus |
| Imagery style | Visual storytelling | Hero images, product photos |
Remember, your branding should be consistent across all marketing channels, not just your website. Ensure that the branding elements you use on your site align with your overall brand guidelines.
D. Optimize for mobile devices
In today’s mobile-first world, optimizing your website for mobile devices is not just an option – it’s a necessity. A mobile-responsive design ensures that your website looks great and functions well on smartphones and tablets, providing a seamless user experience across all devices.
-
Choose a responsive template:
- Most free website builders offer mobile-responsive templates
- These automatically adjust layout and content for different screen sizes
- Ensure your chosen template is fully responsive before customizing
-
Use a mobile-first approach:
- Design for mobile screens first, then expand for larger screens
- Prioritize essential content and features for mobile users
- Simplify navigation for easy touch-screen interaction
-
Optimize images and media:
- Use compressed images to reduce load times on mobile networks
- Implement lazy loading for images and videos
- Consider using mobile-optimized image formats like WebP
-
Adjust typography for mobile:
- Increase font sizes for better readability on small screens
- Use shorter line lengths to prevent horizontal scrolling
- Ensure sufficient contrast between text and background
-
Optimize touch targets:
- Make buttons and links large enough for easy tapping (minimum 44×44 pixels)
- Provide adequate spacing between clickable elements
- Use clear and descriptive labels for all interactive elements
-
Streamline content for mobile:
- Use concise headings and shorter paragraphs
- Implement expandable sections for long content (e.g., accordions)
- Consider using a “hamburger” menu for navigation on small screens
| Mobile Optimization Aspect | Best Practices |
|---|---|
| Layout | Single-column design, stackable elements |
| Navigation | Simplified menu, clear icons, search functionality |
| Content | Prioritized information, scannable text |
| Images | Compressed, responsive sizing |
| Forms | Minimal fields, touch-friendly inputs |
| Load Time | Optimized assets, lazy loading |
-
Test on multiple devices:
- Use browser developer tools to simulate different screen sizes
- Test on actual mobile devices (both iOS and Android)
- Check for any layout issues, text overlaps, or functionality problems
-
Consider progressive enhancement:
- Ensure core functionality works on all devices
- Add enhanced features for more capable devices and browsers
By optimizing your website for mobile devices, you’ll provide a better user experience for a significant portion of your audience, potentially improving engagement, conversions, and search engine rankings.
Now that the design phase is complete, the next step is to focus on creating compelling content that will engage your visitors and effectively communicate your message or offerings.
Create Compelling Content
Write clear and engaging copy
Creating compelling content starts with writing clear and engaging copy. This is the foundation of your website and plays a crucial role in attracting and retaining visitors. To craft effective copy, focus on the following key aspects:
-
Know your audience: Understanding your target audience is essential for creating content that resonates with them. Consider their demographics, interests, and pain points. This knowledge will help you tailor your message and tone to appeal to your specific audience.
-
Use a clear and concise writing style: Keep your sentences short and to the point. Avoid jargon and complex language that might confuse your readers. Instead, opt for simple, easy-to-understand language that conveys your message effectively.
-
Create a strong headline: Your headline is the first thing visitors see, so make it count. Use action words, numbers, or intriguing questions to grab attention and entice readers to continue exploring your content.
-
Structure your content for readability: Break up large blocks of text into smaller paragraphs. Use subheadings, bullet points, and numbered lists to organize information and make it easier for readers to scan and digest your content.
-
Tell a story: Incorporate storytelling elements into your copy to make it more engaging and memorable. Share anecdotes, case studies, or real-life examples that illustrate your points and help readers connect with your message.
-
Focus on benefits: Instead of simply listing features, emphasize the benefits your products or services offer to your audience. Explain how your offerings can solve their problems or improve their lives.
-
Use active voice: Writing in active voice makes your content more dynamic and easier to read. It also helps convey a sense of action and immediacy, which can be more engaging for readers.
-
Include a clear call-to-action (CTA): Guide your readers on what to do next by including a clear and compelling CTA. Whether it’s signing up for a newsletter, making a purchase, or contacting you for more information, make sure your CTA is prominently displayed and easy to follow.
Here’s an example of how to structure your copy using these principles:
#### Our Unique Approach to Web Design

At [Your Company Name], we believe in creating websites that not only look great but also deliver results. Here's how we stand out:

1. **User-Centric Design**: We put your visitors first, ensuring intuitive navigation and seamless experiences.
2. **Mobile Optimization**: Your site will look and function perfectly on all devices, from smartphones to desktops.
3. **Speed and Performance**: We optimize for lightning-fast load times, keeping your visitors engaged.
4. **SEO-Friendly Structure**: Our designs are built with search engines in mind, helping you rank higher.

Ready to transform your online presence? [Contact us today] for a free consultation!
Add high-quality images and videos

Visual content is a powerful tool for enhancing your website’s appeal and effectively conveying your message. High-quality images and videos can significantly improve user engagement and make your content more shareable. Here are some key strategies for incorporating visual elements into your website:
-
Use relevant and high-resolution images: Choose images that are directly related to your content and of high quality. Blurry or pixelated images can make your website appear unprofessional and detract from your message.
-
Optimize images for web: Large image files can slow down your website, affecting user experience and SEO. Use image compression tools to reduce file sizes without compromising quality. Aim for a balance between visual appeal and fast loading times.
-
Create custom graphics: Invest in creating custom graphics, infographics, or illustrations that align with your brand and effectively communicate complex information. These unique visuals can set your website apart and make your content more memorable.
-
Incorporate videos: Videos can be an excellent way to engage visitors and explain complex concepts. Consider adding product demonstrations, explainer videos, or customer testimonials to your site.
-
Use alt text for images: Add descriptive alt text to all images on your website. This improves accessibility for visually impaired users and can also boost your SEO efforts.
-
Implement responsive design for visuals: Ensure that your images and videos display correctly on all devices and screen sizes. Use responsive design techniques to adjust visual elements based on the user’s device.
-
Create a consistent visual style: Develop a cohesive visual style that aligns with your brand identity. Use consistent color schemes, fonts, and image styles throughout your website to create a professional and unified look.
-
Leverage user-generated content: Encourage your customers to share photos or videos of them using your products or services. This not only provides social proof but also adds authenticity to your website.
Here’s a comparison of different types of visual content and their benefits:
| Visual Content Type | Benefits | Best Used For |
|---|---|---|
| High-quality photos | Showcase products or services realistically | Product pages, portfolios |
| Infographics | Simplify complex information | Data visualization, process explanations |
| Videos | Engage viewers and explain concepts | Product demos, tutorials, testimonials |
| Custom illustrations | Create unique brand identity | Landing pages, blog posts |
| User-generated content | Build trust and authenticity | Social proof, community engagement |
Incorporate relevant keywords for SEO
Incorporating relevant keywords into your website content is crucial for improving your search engine rankings and attracting organic traffic. However, it’s important to use keywords strategically and naturally to avoid keyword stuffing, which can negatively impact your SEO efforts. Here are some best practices for incorporating keywords:
-
Conduct thorough keyword research: Use tools like Google Keyword Planner, SEMrush, or Ahrefs to identify relevant keywords and phrases that your target audience is searching for. Focus on a mix of short-tail and long-tail keywords to capture various search intents.
-
Use keywords in strategic locations:
- Page titles and headers (H1, H2, H3 tags)
- First paragraph of your content
- Throughout the body text (naturally)
- Image alt text
- Meta descriptions
- URL structures
-
Focus on user intent: Align your content with the search intent behind the keywords. For example, if a user searches for “how to create a website,” they’re likely looking for a step-by-step guide rather than a product page.
-
Use variations and synonyms: Don’t just repeat the exact same keyword multiple times. Incorporate variations and synonyms to make your content more natural and comprehensive.
-
Optimize for featured snippets: Structure your content to increase the chances of appearing in featured snippets. Use question-and-answer formats, bullet points, and concise definitions for key terms.
-
Create topic clusters: Organize your content around main topics (pillar pages) and related subtopics (cluster content). This helps search engines understand the depth and breadth of your content on specific subjects.
-
Use internal linking: Link related pages within your website using relevant anchor text. This helps search engines understand the structure of your site and the relationships between different pages.
-
Regularly update your content: Keep your content fresh and up-to-date by periodically reviewing and updating it with new information and relevant keywords.
Here’s an example of how to naturally incorporate keywords into your content:
#### How to Create a Website Without Coding

Creating a stunning website doesn't require extensive coding knowledge. With modern free website builders, you can design and launch a professional-looking site in just a few steps. Here's a quick guide to get you started:

1. Choose a user-friendly website builder
2. Select a template that fits your brand
3. Customize your design using drag-and-drop tools
4. Add your content and optimize for SEO
5. Preview and launch your new website

By following these steps, you'll have a DIY website design that looks great and functions smoothly across all devices. Ready to get started? [Try our free website builder today]!
In this example, we’ve naturally incorporated keywords like “free website builder,” “create website without coding,” and “DIY website design” while providing valuable information to the reader.
Now that we’ve covered the essentials of creating compelling content, including writing engaging copy, incorporating visual elements, and optimizing for SEO, you’re well-equipped to develop a website that not only looks great but also performs well in search engine results. The next step is to add functionality to your website, which will enhance user experience and provide additional value to your visitors.
Add Functionality
Set up contact forms
Contact forms are essential for any website, providing a direct line of communication between visitors and the site owner. They serve as a valuable tool for gathering feedback, inquiries, and potential leads. When setting up contact forms, consider the following:
-
Choose the right form builder: Many free website builders offer built-in form creation tools. Select one that balances ease of use with customization options.
-
Keep it simple: Include only necessary fields to encourage completion. Common fields include:
- Name
- Email address
- Subject
- Message
-
Add form validation: Ensure that submitted information is in the correct format to maintain data quality.
-
Implement spam protection: Use CAPTCHA or honeypot techniques to prevent bot submissions.
-
Set up email notifications: Configure the form to send alerts when new submissions are received.
Here’s a comparison of popular free form builders:
| Form Builder | Ease of Use | Customization | Integration | Spam Protection |
|---|---|---|---|---|
| Google Forms | High | Medium | Limited | Built-in |
| Wufoo | Medium | High | Extensive | Available |
| JotForm | High | High | Extensive | Available |
| Typeform | High | High | Good | Available |
Remember to place your contact form in an easily accessible location, such as a dedicated “Contact” page or in the footer of your website.
Integrate social media links
Integrating social media links into your website is crucial for building an online presence and engaging with your audience across multiple platforms. Here are some best practices for social media integration:
-
Choose relevant platforms: Focus on social media channels where your target audience is most active.
-
Use recognizable icons: Opt for familiar social media icons to ensure visitors can quickly identify and click on them.
-
Place links strategically: Consider adding social media links in the header, footer, or sidebar of your website for maximum visibility.
-
Implement social sharing buttons: Allow visitors to easily share your content on their social media profiles.
-
Embed social media feeds: Display real-time updates from your social media accounts directly on your website.
To effectively integrate social media, follow these steps:
- Gather your social media profile URLs
- Select appropriate icons or buttons
- Add the links to your website’s HTML or use your website builder’s built-in tools
- Test the links to ensure they open in a new tab and lead to the correct profiles
- Consider using plugins or widgets for more advanced social media integration
Include a blog or news section
A blog or news section can significantly enhance your website by providing fresh, valuable content to your visitors. It also helps improve your search engine rankings and establishes your expertise in your field. Here’s how to effectively include a blog or news section:
-
Choose a blogging platform: Many website builders offer built-in blogging functionality. Alternatively, you can integrate platforms like WordPress.
-
Plan your content strategy:
- Determine your target audience
- Choose relevant topics
- Create a content calendar
- Set a consistent publishing schedule
-
Optimize your blog layout:
- Use clear, readable fonts
- Implement categories and tags for easy navigation
- Include a search function
- Add social sharing buttons to each post
-
Create engaging content:
- Write compelling headlines
- Use subheadings and bullet points for scannable content
- Include relevant images and videos
- End posts with a call-to-action
-
Encourage reader interaction:
- Enable comments on your posts
- Respond to comments promptly
- Include social sharing buttons
Here’s a list of content ideas to get you started:
- How-to guides and tutorials
- Industry news and updates
- Case studies and success stories
- Expert interviews
- Product reviews and comparisons
- Frequently asked questions (FAQs)
- Behind-the-scenes glimpses of your business
- Guest posts from industry experts
Remember to consistently update your blog with fresh content to keep visitors coming back and improve your search engine rankings.
Implement e-commerce features (if applicable)
If you’re planning to sell products or services through your website, implementing e-commerce features is crucial. Here’s how to set up basic e-commerce functionality:
-
Choose an e-commerce platform: Many free website builders offer built-in e-commerce features or integrations with popular platforms like Shopify or WooCommerce.
-
Set up your product catalog:
- Create detailed product descriptions
- Add high-quality product images
- Organize products into categories
- Set prices and manage inventory
-
Configure payment options:
- Integrate payment gateways (e.g., PayPal, Stripe)
- Set up secure checkout processes
- Offer multiple payment methods (credit cards, digital wallets)
-
Establish shipping options:
- Define shipping zones and rates
- Offer multiple shipping methods (standard, express)
- Consider integrating with shipping carriers for real-time quotes
-
Implement security measures:
- Obtain an SSL certificate for secure transactions
- Comply with PCI DSS standards
- Implement fraud prevention tools
-
Design your store:
- Create an intuitive navigation structure
- Optimize product pages for conversions
- Implement a user-friendly shopping cart
-
Set up order management:
- Configure order notifications
- Establish a system for processing and fulfilling orders
- Create a returns and refunds policy
Here’s a comparison of popular free e-commerce platforms:
| Platform | Ease of Use | Customization | Payment Options | Scalability |
|---|---|---|---|---|
| WooCommerce | Medium | High | Extensive | High |
| Shopify Lite | High | Medium | Good | Medium |
| Ecwid | High | Medium | Good | Medium |
| Square Online | High | Medium | Limited | Medium |
When implementing e-commerce features, prioritize user experience and security to build trust with your customers and encourage repeat business.
Now that we’ve covered how to add functionality to your website, including contact forms, social media integration, a blog or news section, and e-commerce features, you’re well-equipped to create a dynamic and interactive online presence. The next step is to focus on optimizing your website for search engines to improve its visibility and attract more visitors.
Optimize for Search Engines

Research and use relevant keywords
In the realm of search engine optimization (SEO), keyword research forms the foundation of a successful strategy. By identifying and incorporating relevant keywords, you can significantly improve your website’s visibility in search engine results pages (SERPs).
To begin, utilize free keyword research tools such as Google Keyword Planner, Ubersuggest, or Answer the Public. These tools provide valuable insights into search volume, competition, and related terms. Focus on long-tail keywords, which are more specific phrases that typically have lower competition and higher conversion rates.
Consider the following factors when selecting keywords:
- Relevance to your content
- Search volume
- Competition level
- User intent
Here’s a comparison of different keyword types:
| Keyword Type | Example | Search Volume | Competition | Conversion Potential |
|---|---|---|---|---|
| Short-tail | Website | High | High | Low |
| Long-tail | How to create a free website | Medium | Low | High |
| LSI | Web design, site builder | Medium | Medium | Medium |
Once you’ve identified your target keywords, strategically incorporate them into your website’s content, including:
- Page titles
- Headings and subheadings
- First paragraph of content
- Throughout the body text (naturally)
- Image alt text
- URLs
Remember to maintain a natural flow in your writing and avoid keyword stuffing, which can negatively impact your SEO efforts.
Write meta descriptions and titles
Meta descriptions and titles play a crucial role in both SEO and user experience. They provide search engines with concise summaries of your web pages and entice users to click through to your site.
When crafting meta titles:
- Keep them under 60 characters to ensure they display fully in search results
- Include your primary keyword near the beginning
- Make them unique for each page
- Use power words to grab attention (e.g., “Ultimate,” “Free,” “Easy”)
For meta descriptions:
- Aim for 150-160 characters
- Incorporate relevant keywords naturally
- Provide a clear, compelling summary of the page content
- Include a call-to-action when appropriate
Here’s an example of an effective meta title and description:
Title: Create a Free Website in 5 Easy Steps | Ultimate DIY Guide
Description: Learn how to build a stunning website for free without coding. Our step-by-step guide covers planning, design, content creation, and launching your site.
Optimize images with alt text

Image optimization is often overlooked but can significantly impact your website’s SEO performance. Alt text (alternative text) serves two primary purposes:
- Improving accessibility for visually impaired users
- Helping search engines understand the content of your images
When adding alt text to your images:
- Be descriptive and specific
- Keep it concise (aim for 125 characters or less)
- Include relevant keywords naturally
- Avoid keyword stuffing
- Use context-appropriate language
Here’s an example of good vs. bad alt text:
Good: "Woman creating a website using a free drag-and-drop builder"
Bad: "Website free create online builder drag drop easy"
In addition to alt text, optimize your images by:
- Using descriptive file names (e.g., “free-website-builder-interface.jpg” instead of “IMG001.jpg”)
- Compressing images to reduce file size without sacrificing quality
- Using appropriate file formats (JPEG for photographs, PNG for graphics with transparency)
- Implementing responsive images to ensure proper display across devices
Create an XML sitemap
An XML sitemap is a file that lists all the important pages on your website, helping search engines crawl and index your content more efficiently. Creating and submitting a sitemap can improve your website’s visibility in search results.
To create an XML sitemap:
- Use a sitemap generator tool or plugin (many free website builders offer this feature)
- Include all important pages, excluding duplicate content or non-essential pages
- Prioritize your pages (use values between 0.0 and 1.0, with 1.0 being the highest priority)
- Set the change frequency for each page (e.g., daily, weekly, monthly)
- Add the last modified date for each page
Here’s a simple example of an XML sitemap structure:
<?xml version="1.0" encoding="UTF-8"?>
<urlset xmlns="http://www.sitemaps.org/schemas/sitemap/0.9">
  <url>
    <loc>https://www.example.com/</loc>
    <lastmod>2023-04-01</lastmod>
    <changefreq>daily</changefreq>
    <priority>1.0</priority>
  </url>
  <url>
    <loc>https://www.example.com/about</loc>
    <lastmod>2023-03-15</lastmod>
    <changefreq>monthly</changefreq>
    <priority>0.8</priority>
  </url>
</urlset>
Once you’ve created your sitemap:
- Save it as “sitemap.xml” in your website’s root directory
- Add the sitemap location to your robots.txt file
- Submit the sitemap to search engines through their respective webmaster tools (e.g., Google Search Console, Bing Webmaster Tools)
By implementing these SEO optimization techniques, you’ll significantly improve your website’s visibility in search results. Remember that SEO is an ongoing process, so regularly review and update your strategies to maintain and improve your search engine rankings.
Now that you’ve optimized your website for search engines, the next step is to thoroughly test your site and prepare for launch. This final phase ensures that your website is fully functional, visually appealing, and ready to make a strong first impression on visitors.
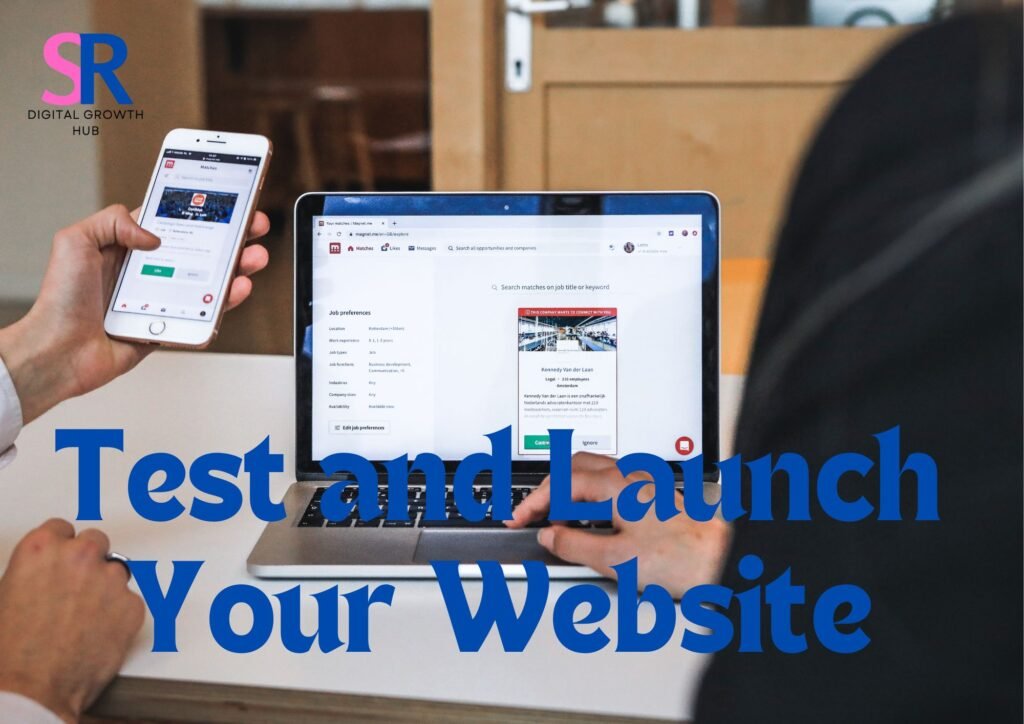
Test and Launch Your Website
Preview on different devices and browsers
Before launching your website, it’s crucial to ensure it looks and functions perfectly across various devices and browsers. This step is essential for providing a seamless user experience to all visitors, regardless of how they access your site.
Start by testing your website on desktop computers using popular browsers such as Google Chrome, Mozilla Firefox, Safari, and Microsoft Edge. Pay close attention to the layout, formatting, and functionality of each page. Next, move on to mobile devices, including smartphones and tablets with different screen sizes and operating systems (iOS and Android).
When previewing on mobile devices, consider the following:
- Responsive design: Ensure that your website adapts smoothly to different screen sizes
- Touch functionality: Test all interactive elements for easy tapping and scrolling
- Load times: Check if pages load quickly on mobile data connections
- Readability: Verify that text is legible without zooming
Here’s a checklist to guide your preview process:
- Desktop browsers (Chrome, Firefox, Safari, Edge)
- iOS devices (iPhone, iPad)
- Android devices (various screen sizes)
- Tablets (iOS and Android)
By thoroughly testing your website across multiple platforms, you’ll identify and address any inconsistencies or issues before your site goes live.
Check for broken links and errors
A website with broken links or errors can frustrate visitors and negatively impact your site’s credibility. Conducting a comprehensive check for these issues is vital before launching your website.
To check for broken links:
- Use a broken link checker tool (many free options are available online)
- Manually click through all internal and external links on your site
- Verify that all navigation menus and buttons work correctly
When checking for errors, look out for:
- 404 errors (page not found)
- Missing images or media files
- Incorrect redirects
- JavaScript errors
- CSS styling issues
Create a spreadsheet to document any issues you find, including the page URL, the specific problem, and its priority level. This organized approach will help you systematically address and resolve all issues before launch.
| Issue Type | Example | Priority |
|---|---|---|
| Broken link | Home page > About Us link | High |
| Missing image | Product page > Main product photo | High |
| CSS styling | Contact form misaligned on mobile | Medium |
| 404 error | Blog post link from homepage | High |
Ensure fast loading times
Website speed is crucial for user experience and search engine optimization. Slow-loading pages can lead to high bounce rates and poor search engine rankings. To ensure your website loads quickly:
-
Optimize images:
- Compress images without sacrificing quality
- Use appropriate file formats (JPEG for photographs, PNG for graphics with transparency)
- Implement lazy loading for images below the fold
-
Minify code:
- Remove unnecessary whitespace and comments from HTML, CSS, and JavaScript files
- Use a minification tool to streamline your code
-
Leverage browser caching:
- Set appropriate expiration dates for cached resources
- Use a content delivery network (CDN) for static assets
-
Reduce server response time:
- Choose a reliable hosting provider
- Implement server-side caching
-
Minimize HTTP requests:
- Combine multiple CSS and JavaScript files
- Use CSS sprites for small, recurring images
To measure your website’s speed, use tools like Google PageSpeed Insights or GTmetrix. These tools provide valuable insights and recommendations for improving your site’s performance.
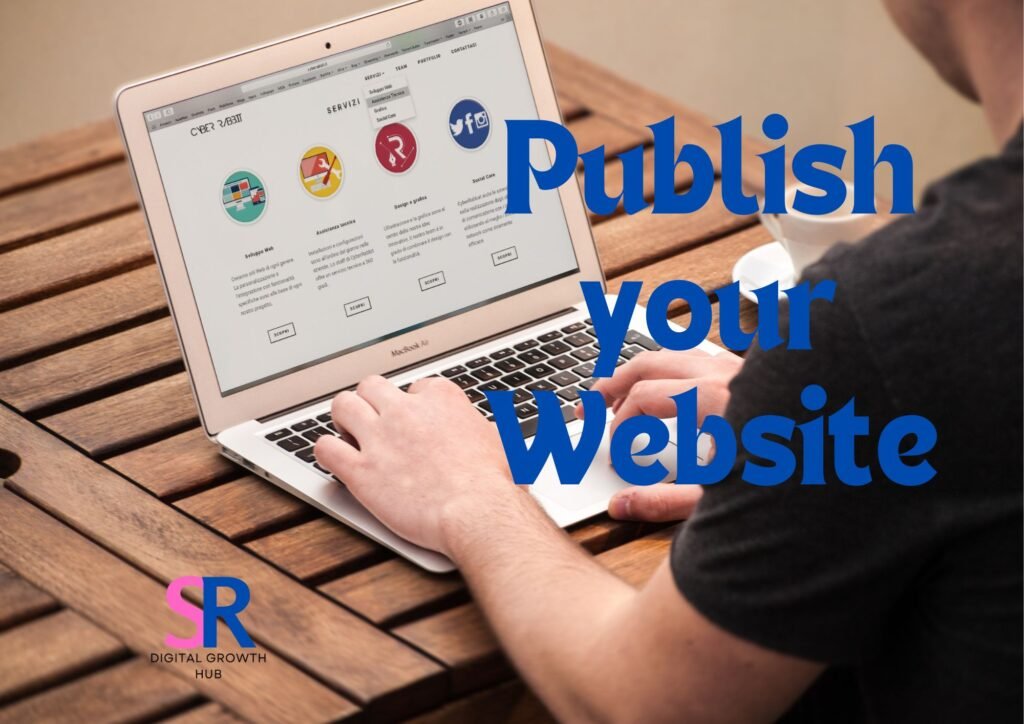
Publish your website
Once you’ve thoroughly tested your website and addressed any issues, it’s time to publish. The exact process may vary depending on your chosen website builder, but generally, it involves the following steps:
-
Review your website settings:
- Verify your domain name is correctly set up
- Check SEO settings (meta descriptions, titles, etc.)
- Ensure analytics tools are properly integrated
-
Backup your website:
- Create a complete backup of your site before publishing
- Store the backup in a secure location
-
Choose your publishing options:
- Select your desired URL structure
- Set up any necessary redirects from old pages (if applicable)
-
Click the “Publish” or “Go Live” button:
- Follow your website builder’s specific instructions for publishing
-
Verify your live website:
- Check that your site is accessible via its intended URL
- Perform a final review of all pages and functionality
Remember to keep a record of your login credentials and any important information related to your website hosting and management.
Announce your new site on social media
Launching your website is an exciting milestone, and sharing it on social media can help drive initial traffic and engagement. Here’s how to effectively announce your new site:
-
Prepare your announcement:
- Craft a compelling message highlighting the purpose and value of your new website
- Create visually appealing graphics or screenshots to accompany your posts
- Develop a unique hashtag for your website launch
-
Choose the right platforms:
- Focus on social media channels where your target audience is most active
- Tailor your message for each platform (e.g., shorter for Twitter, more detailed for LinkedIn)
-
Time your announcements:
- Schedule posts for optimal times when your audience is most likely to be online
- Consider staggering announcements across different platforms to maintain momentum
-
Engage with your audience:
- Respond promptly to comments and questions about your new site
- Encourage sharing and feedback from your followers
-
Leverage your network:
- Ask friends, colleagues, and business partners to share your announcement
- Consider reaching out to influencers or industry leaders for additional exposure
Here’s an example social media announcement schedule:
| Platform | Content Type | Timing |
|---|---|---|
| Detailed post with images | Day 1, 10:00 AM | |
| Short tweet with link | Day 1, 2:00 PM | |
| Professional announcement | Day 2, 9:00 AM | |
| Story + Feed post | Day 2, 12:00 PM | |
| Email newsletter | Detailed announcement | Day 3, 10:00 AM |
By following these steps to test, launch, and announce your website, you’ll ensure a smooth and impactful debut for your online presence. Remember to continuously monitor your site’s performance and gather user feedback to make ongoing improvements and keep your website fresh and engaging.
Creating a stunning website for free is not only possible but also achievable in just a few simple steps. By choosing the right website builder, planning the structure, designing an appealing layout, crafting compelling content, and adding essential functionality, anyone can build an impressive online presence without breaking the bank. The key is to leverage user-friendly tools and platforms that offer robust features without requiring extensive technical knowledge.
Implementing search engine optimization techniques and thoroughly testing the website before launch are crucial final steps in ensuring its success. With these strategies in place, individuals and businesses alike can establish a professional and effective web presence that attracts and engages their target audience. By following this streamlined process, creating a free website becomes an accessible and rewarding endeavor for all.